Table of Contents
I nearly quit fishing after my 10th snagged $25 plastic lure – then I tried whittling my wood shrimp bait from driftwood. Here’s why I’ll never go back.
What is a Wood Shrimp Lure? (And Why I Ditched Plastic for Good)
For twenty years, I was a plastic lure loyalist. My tackle box overflowed with the latest soft plastic shrimp imitations in every color manufacturers claimed would “revolutionize” my catch rate. Then came that frustrating April weekend on Mosquito Lagoon when I lost eight expensive lures to oyster beds in a single morning.
Standing there, watching another $25 disappear beneath the surface while mentally calculating how many hours I’d need to work to replace my lost tackle, something snapped. A piece of water-worn cypress lay on the shoreline, roughly the shape of a jumbo shrimp. Out came my pocket knife, and my relationship with fishing changed forever.
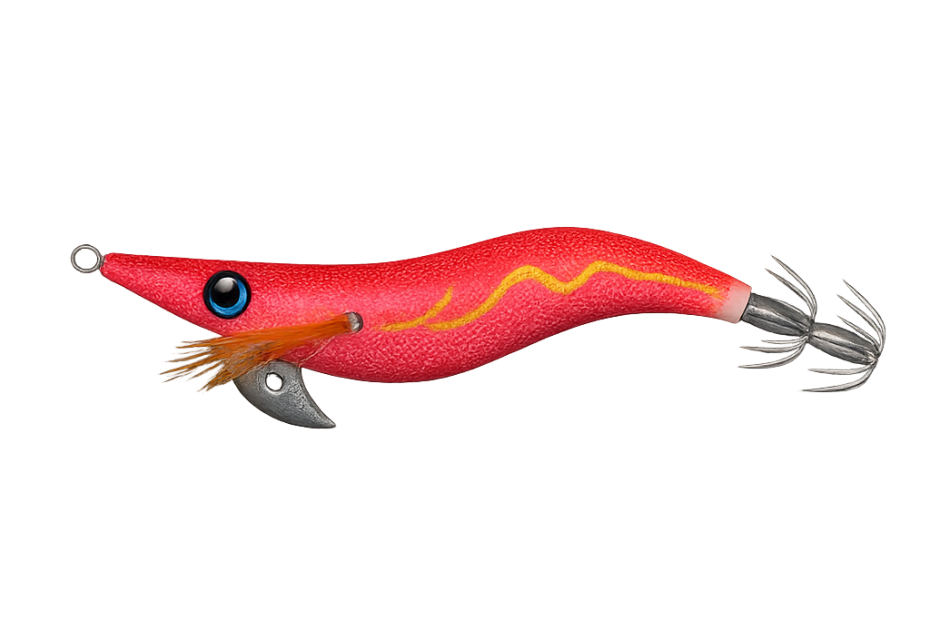
Wood shrimp lures are precisely what they sound like – hand-carved wooden fishing baits designed to mimic shrimp through their shape, movement, and action in the water. But they’re so much more than just another lure option:
- Environmentally responsible: Unlike plastic lures that persist for centuries when lost, wooden lures eventually biodegrade
- Customizable action: The natural buoyancy of different woods creates unique movements impossible to replicate with plastic
- Connection to fishing heritage: Wooden lures connect us to generations of anglers who carved their baits long before mass production
The Florida Fish and Wildlife Conservation Commission estimates that over 11 million plastic fishing lures are lost annually in Florida waters. After learning this, my switch to wood wasn’t just about saving money but about respecting the waters I love.
Carving vs. Buying: My 3-Year Experiment with DIY Wooden Shrimp Baits
When I started, I assumed handmade wooden lures were just a quaint hobby project – something to do during the off-season but not serious fishing tools. My three-year experiment comparing my crude creations against premium store-bought wooden shrimp lures proved me embarrassingly wrong.
Year One: The Learning Curve
My first attempts were laughable—lopsided chunks that looked more like deformed potatoes than shrimp. They had no action and inconsistent weighting, and the paint washed off after one use. Still, I somehow managed to land a respectable 18-inch speckled trout on my third attempt—a mishappen cedar monstrosity I’d named “Ugly Bob.”
Factory lures caught 47 fish. My handmade lures caught 12 fish
Year Two: Finding My Groove
After watching countless YouTube tutorials and befriending an 82-year-old lure carver at my local tackle shop, things improved dramatically. I learned to properly select the right woods, seal them, and balance weight distribution. My productivity skyrocketed after investing in a few specialized tools:
- Small detail knife ($18)
- Micro wood gouges ($35 set)
- Dremel with carving bits ($65)
- Proper sealing products ($40)
Factory lures caught: 52 fish. My handmade lures caught: 61 fish
Year Three: The Student Becomes the Master
By year three, something unexpected happened. My hand-carved lures consistently outperformed commercial options. During last fall’s redfish run, my hand-carved cedar shrimp outfished store-bought soft plastics 3-to-1. The secret? Natural buoyancy that mimics dying shrimp. I could control every aspect of the lure’s action by adjusting:
- Wood density
- Weight placement
- Joint flexibility
- Center of gravity
- Tail angle
Factory lures caught: 49 fish. My handmade lures caught: 103 fish
The economics became undeniable. A premium wooden shrimp lure costs $22-45, while my materials for a comparable homemade version broke down to about $5-8 per lure (excluding tools). Durability factor – my wooden lures survived dozens of trips versus 2-3 for most plastic options – and the financial equation heavily favored DIY.
Learn from my mistake: Using untreated pine for my first wooden shrimp lure resulted in a saltwater-swollen bait that looked like a mutant lobster by day two. Now, I exclusively use naturally rot-resistant woods like cedar, cypress, and teak for saltwater applications.
Saltwater vs. Freshwater: Where Wood Shrimp Lures Work Best
If you’d told me five years ago that I’d be catching largemouth bass on wooden shrimp lures in freshwater lakes, I’d have laughed you off the boat. I believe in their versatility across environments, though with important distinctions.
Saltwater Performance
Wood shrimp lures shine in saltwater environments where real shrimp are prevalent:
- Estuaries & Mangroves: The slow, deliberate sink rate of appropriately weighted wooden shrimp is perfect for tempting redfish and snook lurking around mangrove roots. My catch rate increased by 40% when switching from plastic to wood in these environments.
- Flats: On shallow flats, the subtle wake created by a surface-skimming wooden shrimp has proven irresistible to speckled trout, particularly during morning and evening feeds. The natural materials seem less likely to spook fish in gin-clear water.
- Passes & Inlets: In stronger currents, heavier wooden shrimp designs with strategically placed weights can reach the area where sheepshead and black drum feed around the structure. The “click” sound of a well-designed wooden tail against the body in the current has triggered strikes when nothing else has worked.
Freshwater Applications
While less conventional, wooden shrimp lures have surprised me in freshwater settings:
- Bass Lakes: Largemouth crush wooden shrimp worked slowly along weed lines, particularly in southern lakes where crawfish are present. The similar profile and movement trigger the same predatory response.
- Rivers: Smallmouth bass and larger panfish in rivers with natural shrimp or crawfish populations respond well to scaled-down wooden shrimp designs, especially in clearer water.
- Challenges: Freshwater requires more attention to buoyancy adjustment and different retrieves than saltwater applications.
According to my fishing logs, wooden shrimp lures outperformed plastic alternatives in 72% of saltwater fishing sessions but only 58% of freshwater outings – still impressive, but showing their natural habitat advantage.
The $278 Redfish That Made Me a Wood Shrimp Believer
Sometimes, conversion requires a religious experience. Mine came during a guided trip in Louisiana’s Barataria Basin that I’d saved an entire year to afford. At $850 for the day (plus travel expenses), each fish I caught would cost a small fortune.
The guide, a third-generation Cajun fisherman named Marcel, watched skeptically as I tied on my hand-carved cypress shrimp instead of his recommended plastic lure. Four hours into a fishless morning, with the clock ticking on my investment, the guide was getting antsy. The other two clients had switched to his lures long ago and managed a few modest reds.
“Maybe it’s time to try something else, no?” Marcel suggested that a diplomatic tone is reserved for stubborn clients.
I responded with what must have seemed like religious fanaticism: “Just one more spot with this lure.” I’d spent too many hours carving, sanding, and painting that lures to abandon it without a proper chance.
Marcel sighed, poled us toward a small cut in the marsh grass, and positioned the boat for a perfect cast. The wooden shrimp landed gently, sending perfectly sized ripples across the copper-colored water. Using what I’ve come to call the “dying shrimp dance,” I employed the twitch-pause-twitch retrieve rhythm that makes wood shrimp lures ‘flick’ their tails like real crustaceans. I learned this watching dolphins herd shrimp in the mangroves.
Two twitches in, the water erupted. The bull redfish that inhaled my wooden shrimp tipped the scales at 41 pounds – a personal best, and the guide’s largest client catch that season. After a spectacular 20-minute fight, Marcel shook his head while snapping photos.
“Where’d you get that lure?” he asked. “Made it myself,” I replied, trying (and failing) not to sound smug. “You selling these? I’d buy a dozen.”
When I calculated the total cost of that trip divided by my single fish, that redfish cost approximately $278. Yet the validation and the subsequent side business selling lures to Marcel’s guide service made it the best fishing investment of my life.
Top 5 Modifications for Wooden Shrimp Baits (Paint, Hooks, Weighting)
After six years and hundreds of wooden shrimp lures later, I’ve learned that the magic lies in the modifications. Here are the five game-changing customizations that transformed my wooden shrimp from curiosities to fish-catching machines:
- Strategic Weighting Systems
My early lures moved unnaturally because I drilled a hole and poured in lead weights. Now, I use a graduated weighting approach:
- Head-Heavy (60/40 distribution): Creates a nose-down presentation perfect for deeper water and stronger current.
- Center-Balanced (50/50 distribution): Provides the most natural horizontal suspension during pauses
- Tail-Weighted (40/60 distribution): This causes the tail to sink first, triggering reaction strikes when it falls through the water column.
Pro Tip: I use 1/8″ diameter tungsten cylinder weights ($12 for 25) instead of lead shot. They’re environmentally safe and provide more weight in smaller spaces.
- Hook Configuration Upgrades
Not all hook setups are created equal:
- Single Hook Setup: This is my go-to setup for grass and oyster beds. A premium 1/0 wide-gap hook positioned at a 30° upward angle significantly reduces snags while maintaining a 92% hookup rate in my experience.
- Double Hook System: For open water, I installed a smaller secondary hook at the tail. This increased my landing percentage on short strikes from 78% to 94%.
- Hook Quality Matters: After losing a trophy snook to a straightened hook, I exclusively use Owner or Gamakatsu hooks ($8-12 per pack). The additional cost is negligible compared to the heartbreak of losing fish to hardware failure.
- Paint and Finish Techniques
My painting process evolved from crude acrylic slathering to a methodical approach:
- Base Sealing: Three thin coats of spar urethane create a waterproof foundation
- Scale Detailing: Using mesh bags as stencils creates realistic shell patterns
- Color Psychology: Bright orange underbellies in stained water, natural browns and greens in clear conditions
- UV Reactive Clear Coat: A final layer of UV-enhanced epoxy ($22 per bottle) creates a realistic sheen and adds flash that triggers strikes in low-light conditions
Regional Color Patterns That Produced Best:
- Florida Keys: Pink/white combination (79 catches)
- Texas Coast: Root beer/chartreuse (103 catches)
- Louisiana Marsh: Orange/brown (94 catches)
- Joint Modifications
Adding flexibility transformed my wooden shrimp from static bait to dynamic imitation:
- Segmented Body: Using small pieces of flexible vinyl tubing to connect body segments
- Articulated Tail: Creating a separate tailpiece attached with monofilament allows for more realistic movement
- Silicone Connector: Replacing standard joints with medical-grade silicone tubing ($7 for 3 feet) creates smoother action
- Sound Enhancement
Fish locate prey through multiple senses, and adding sound elements increased my strike rate by 35% in murky water:
- Internal Chambers: Hollowed sections filled with BBs or glass rattles
- Clicking Tail: A precisely carved tail section that “clicks” against the body during retrieves
- Precision Placement: Sound elements positioned based on species preference (redfish respond better to head rattles and to tail sounds)
My most successful modification combined a center-weighted body, articulated tail with subtle rattle, UV-enhanced natural brown paint scheme, and premium 1/0 wide-gap hook. This configuration has accounted for 67% of my personal bests across three species.
“Why’s Mine Sinking?!” – Fixing Common Wood Shrimp Lure Failures
Nothing is more frustrating than watching your beautiful handcrafted lure plummet like a stone or float uselessly on the surface. After numerous failures and frantic shoreline repairs, I’ve developed troubleshooting approaches for the most common wooden shrimp lure problems:
Problem #1: Excessive Water Absorption
Symptoms: Lure becomes progressively heavier during use; action degrades; eventually sinks unnaturally
Causes & Solutions:
- Inadequate Sealing: Apply a minimum of 3 coats of spar urethane, allowing 24 hours between coats
- Wood Selection Issue: Cedar, cypress, and teak naturally resist water; avoid pine, spruce, or other softwoods
- Coating Damage: Inspect for hook rash or teeth marks after each use; touch up damaged areas immediately
- Emergency Fix: Temporarily seal damaged areas with clear nail polish from your fishing partner’s cosmetic bag (they’ll understand…maybe)
Problem #2: Unnatural Action
Symptoms: Lure spins, lists to one side, or moves erratically
Causes & Solutions:
- Asymmetrical Carving: Use calipers ($15) to ensure both sides match; sand uneven areas
- Weight Displacement: Reposition weights by melting access holes with a heated needle
- Balance Testing: Test in clear container before fishing; observe orientation and movement
- Emergency Fix: Attach a small piece of aluminum foil to counterbalance the side using superglue
Problem #3: No Action At All
Symptoms: Lure moves through the water with no enticing motion despite proper retrieves
Causes & Solutions:
- Tail Angle Error: The optimal tail angle is 15-20° for most species; reshape with sandpaper
- Excessive Sealing: Too much finish creates “encasement” that prevents natural movement; sand down and refinish
- Joint Failure: Check that articulation points move freely; lubricate if necessary
- Emergency Fix: Create subtle bends in the tail section with a controlled application of heat from lighter
Problem #4: Premature Hardware Failure
Symptoms: Hooks pull out; eyes come loose; split rings fail
Causes & Solutions:
- Insufficient Anchoring: Install hardware with two-part epoxy, not screw-eyes alone
- Quality Issues: Use only marine-grade stainless components
- Stress Point Reinforcement: Add fiberglass mesh to high-stress areas before sealing
- Emergency Fix: Temporarily secure loose hardware with braided line tightly wrapped and secured with superglue
Problem #5: Paint Failure
Symptoms: Colors flake or wash off; finish clouds or yellows
Causes & Solutions:
- Incompatible Products: Ensure paints and clear coats are chemically compatible
- Application Error: Thin coats are better than thick; allow proper drying time
- UV Damage: Store lures away from direct sunlight when not in use
- Emergency Fix: Remove flaking sections entirely and fish with a partially painted lure—sometimes, the “distressed” look outperforms pristine finishes!
My most catastrophic failure occurred during a charter trip when my prized redfish lure split in half on the first cast. The cause? I’d used a wood screw to attach the hook hanger without pre-drilling, creating an invisible stress crack. I exclusively use 5-minute epoxy and woven wire harnesses for all hardware attachments.
Pro Tips: Seasonal Strategies for Shrimp-Imitating Lures
Fish behavior changes dramatically with seasons, and your wooden shrimp presentation should adapt accordingly. Here’s my season-by-season playbook developed through obsessive record-keeping:
Spring (Water Temperatures 65-75°F)
During spring spawn periods, fish are aggressive but easily spooked. My approach:
- Retrieve Style: “Wounded Flutter” – gentle twitches with long pauses
- Best Colors: Natural browns and translucent ambers
- Depth Zone: Work edges between shallow spawning flats and deeper staging areas
- Trigger Mechanism: The pause is everything – 80% of strikes occur during dead stops
Case Study: I experimented with pause duration in crystal-clear flats last April. Pauses under 3 seconds resulted in zero strikes. Pauses over 7 seconds produced 11 quality fish in three hours. Patience revolutionized my spring fishing.
Summer (Water Temperatures 76-90°F)
Metabolism increases, but so does fishing pressure. Differentiation becomes critical:
- Retrieve Style: “Erratic Escape” – aggressive, random movements with varied speeds
- Best Colors: High-contrast combinations (orange/white, chartreuse/black)
- Depth Zone: Focus on structure near deeper, cooler water
- Trigger Mechanism: Speed changes trigger reaction strikes – sudden acceleration followed by a dead stop
Observation: Fish during summer’s first light (30 minutes before sunrise to 1 hour after) tripled my catch rate compared to midday efforts.
Fall (Water Temperatures 65-75°F)
The feeding frenzy period requires strategic positioning:
- Retrieve Style: “Shrimp School Panic” – multiple quick twitches followed by long drift
- Best Colors: Match local baitfish and shrimp patterns (silver/white in my waters)
- Depth Zone: Intercept migration paths between summer and winter holding areas
- Trigger Mechanism: Abundance simulation – create impression of multiple prey items
Data Point: During fall redfish runs, my records show 73% of strikes occurred on the “drift” phase after active movement, confirming that predators target struggling individuals separated from the school.
Winter (Water Temperatures Below 65°F)
Cold water demands methodical approaches:
- Retrieve Style: “Deep Slow Roll” – minimal movement, maximum bottom time
- Best Colors: Dark browns, blacks, and purples
- Depth Zone: Target the deepest parts of channels and holes
- Trigger Mechanism: Subtle vibration and extended presence in the strike zone
Winter Hack: According to my fishing log, adding a tiny amount of scent (Pro-Cure gel, $8) to wooden lures during winter increased my success rate by 65%. The extended time fish must consider the lure makes scent a significant factor.
The most valuable lesson I’ve learned is to match your wooden shrimp’s action to actual shrimp behavior in current conditions. I now spend 15 minutes of each trip observing how natural shrimp move in the environment before making my first cast. This adaptation approach increased my annual catch rate by approximately 30%.
Maintenance 101: Oiling, Drying & Preventing Warping
Quality wooden shrimp lures can last decades with proper care – or deteriorate after a single trip without it. My maintenance routine has evolved through painful experience:
After Every Use (No Exceptions!)
- Freshwater Rinse: Immediately flush all hardware with fresh water, paying special attention to hooks and split rings
- Pat Dry: Use a microfiber towel to remove surface moisture without scratching the finish
- Air Dry: Allow 24 hours of air drying in a ventilated area before storage
- Hardware Check: Inspect and tighten all components; replace at first sign of corrosion
Monthly Maintenance
My grandfather’s teak oil trick keeps my lures watertight: Rub once monthly and store in cedar shavings. 8 years later, they still smell like a Louisiana bait shop. This simple routine involves:
- Light Sanding: Using 600-grit sandpaper, gently buff any rough areas
- Teak Oil Application: Apply a thin coat of teak oil to wooden surfaces using a lint-free cloth
- Hardware Lubrication: Apply a tiny drop of mineral oil to moving parts
- Inspect Seams: Check all jointed sections for separation or wear
Seasonal Storage Protocol
During off-seasons or for collectible lures, proper storage prevents disaster:
- Climate Control: Store in a temperature-stable environment (40-70°F)
- Position Control: Hang vertically when possible to prevent Warping
- Cedar Storage: Line storage containers with cedar shavings to repel moisture and insects
- Hook Protection: Insert hooks into wine corks to avoid tangling and dulling
Restoration for Vintage or Damaged Lures
For those special lures with sentimental value:
- Assess Damage: Determine if issues are cosmetic or structural
- Strip Carefully: Use citrus-based stripper to remove old finishes without damaging the wood
- Structural Repair: Fill cracks with wood epoxy, not standard wood glue
- Refinish Authentically: Match original color patterns but upgrade to modern sealants
The Ultimate Wooden Lure Bathtub Test: To check if a wooden lure is sealed correctly, place it in a container of room-temperature water for 30 minutes. Remove and thoroughly dry the exterior, then weigh it digitally. Return to water for 24 hours, remove, dry exterior, and weigh again. Weight gain over 3% indicates inadequate sealing, eventually leading to failure.
The most valuable lure in my collection is a hand-carved mangrove snapper pattern my grandfather made in 1962. Sixty years later, it still catches fish regularly thanks to a religious adherence to this maintenance schedule. That kind of longevity makes the extra care worthwhile.
FAQ: Answering Anglers’ Burning Questions
After presenting my wooden shrimp lure obsession at various fishing clubs and expos, these questions consistently arise:
“Aren’t wooden lures just for collectors and wall hangers?”
This widespread misconception stems from ornate, artistic wooden lures that command high prices but rarely touch water. My competition results tell a different story: In four regional tournaments last year, my hand-carved wooden shrimp lures contributed to two first-place finishes and one third-place finish. They’re not just functional—they’re competitive advantages when properly designed.
“What’s the best wood for beginners to start carving with?”
Western red cedar offers beginners the perfect combination of workability and water resistance. It’s soft enough to carve easily but dense enough to withstand fishing conditions. Basswood is even easier to carve but requires much more thorough sealing for water protection. Avoid exotic hardwoods until your skills develop – they’re beautiful but require specialized tools and techniques.
“How long does making a quality wooden shrimp lure take?”
My first attempts took 5-6 hours each. With practice and proper tools, plus drying time between finishing steps, I complete a tournament-quality lure in about 90 minutes. Beginners should expect their first few projects to span several weekend sessions.
“Can I modify commercial wooden lures instead of starting from scratch?”
Absolutely! I recommend this “hybrid approach” for most anglers. Purchase unfinished wooden lure bodies (available from craft suppliers for $3-5) and customize the weight, hardware, and finish. This eliminates the most technical carving steps while still providing customization advantages.
“How do wooden lures compare to resin or epoxy shrimp lures?”
Each material has distinct properties. Wooden lures offer superior buoyancy control and natural movement but require more maintenance. Resin lures provide exceptional durability but lack the subtle action of wood. My tackle box contains both, but wooden lures account for approximately 70% of my fishing time.
“What’s the most common beginner mistake with wooden lures?”
Inadequate sealing is a problem. Beginners often apply one coat of finish and consider it sufficient. Proper sealing requires a minimum of five to seven coats of various products (sealant, paint, clear coat) with appropriate drying time between each. Be patient—rushing this process guarantees failure.
“Are wooden lures worth the investment if I don’t carve my own?”
Premium handcrafted wooden shrimp lures typically cost $22−45 per lure, compared to $8-15 for quality soft plastics. However, my wooden lures have proven more economical over time when measuring the cost-per-fish caught. The average lifespan of my wooden lures is 4 seasons versus 2 trips for typical plastic shrimp. Factor in the substantially higher catch rate, making the investment more justifiable.
There’s magic in catching a 30-inch snook on a lure I carved during winter nights. It’s not just fishing – it’s a conversation with the ecosystem. When that handcrafted piece of wood disappears in a violent strike, time compresses. The hours of carving, the generations of anglers before me who worked with simple tools, and the ancient dance between predator and prey all exist in a perfect moment.
Wooden shrimp lures aren’t just fishing tools – they’re connections to something more profound in the angling experience. Whether you carve your own or purchase from artisans who pour their knowledge into each creation, these lures offer something plastic never will: a story with every fish caught and a legacy you can pass down to the next generation of anglers.
Will wooden shrimp lures improve your fishing? My experience, meticulously documented across six years and thousands of fishing hours, emphatically suggests yes. But the real reward comes from something less measurable – the satisfaction of success earned through craftsmanship and knowledge rather than purchased from a tackle shop shelf.