Table of Contents
Picture this: You’ve found the perfect spot, tied on your lucky lure, and pulled back for what should be the cast of the day. Instead of watching your line sail gracefully toward that promising structure, you’re staring at a tangled mess that looks like a spider’s nightmare. Sound familiar?
I’ve been there more times than I care to admit. For years, I figured getting line onto the reel was good enough – crank it on and go fishing, right? Boy, was I wrong? The difference proper spooling technique makes in actual fishing enjoyment is night and day. There are less cussing, more catching, and way fewer embarrassing moments trying to untangle a bird’s nest while other anglers are landing fish left and right.
Here’s the truth: improper spooling leads directly to tangles, reduced casting distance, annoying line memory issues, and, worst of all, lost fish. This guide will show you exactly why these problems happen and how to spool like a seasoned pro, whether you’re working with monofilament, fluorocarbon, or braided line.
The Tangled Truth: Common Spooling Problems & Why They Happen
Understanding why your line misbehaves is half the battle to preventing it. Let me walk you through the most common culprits that turn a peaceful fishing trip into a lesson in patience and profanity.
The Curse of Line Memory & Coiling (Especially Mono/Fluoro)
Line memory is precisely what it sounds like – your fishing line “remembers” the shape of the spool it was wound on. This creates those annoying springy coils that seem determined to ruin every cast. That springy mess coming off your reel isn’t just irritating; it kills your lure’s natural action and destroys casting accuracy.
I learned this lesson the hard way during a bass tournament when my monofilament looked like it was doing interpretive dance instead of presenting my spinnerbait naturally. The cheap line often has worse memory issues, but even a premium line will give you grief if you spool it incorrectly.
Backlash City: The Dreaded Tangles During Spooling & Fishing
Those frustrating tangles don’t just appear out of nowhere – they’re directly linked to incorrect tension during spooling, overfilling your spool, or introducing line twists during the winding process. Every loose loop you allow during spooling is a future headache waiting to happen.
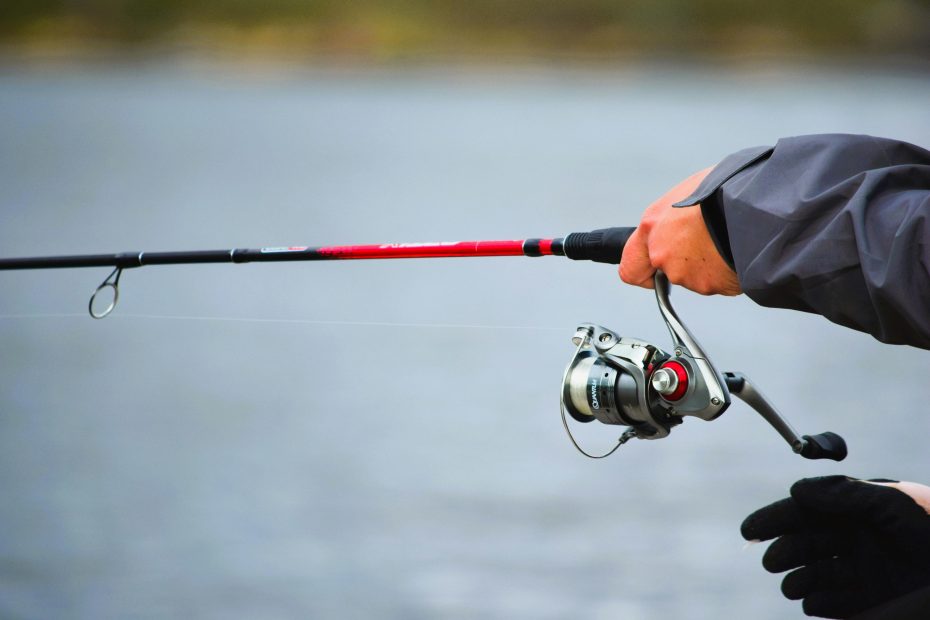
The Slippery Slope: Braided Line Spinning on the Spool
The braided line’s lack of stretch and the slick surface can be a blessing and a curse. Without proper anchoring, the braid will slip and spin on your spool like a tyre on ice. Nothing destroys your confidence quite like a powerful cast where your braid spins uselessly on the spool, leaving your lure about ten feet from shore. Trust me – it’s embarrassing and completely avoidable with the proper technique.
The Simple Oversight: Forgetting to Open the Bail (Spinning Reels)
This might sound too basic to mention, but I’ve watched experienced anglers make this mistake more times than you’d expect. If you forget to open the bail on your spinning reel before spooling, you’re guaranteed immediate problems. It’s such a simple step, but missing it ruins everything that follows.
Overstuffing: When More Line is Less
More isn’t always better, especially when it comes to spool capacity. An overfilled spool creates a cascade of problems: increased backlash, unexpected wind knots, and lines popping off during casting. I once overfilled a reel with just a few wraps and spent an entire morning dealing with the consequences rather than fishing.
Spooling Savvy: Best Practices for Tangle-Free Performance
Now that you understand what goes wrong let’s dive into how to do it right. These step-by-step techniques will transform your line from a constant adversary into a reliable fishing tool.
Step 1: Setting the Stage – Prep is Paramount
Remove Old Line Thoroughly: Start with a completely clean spool. I use a cordless drill with the old line attached to strip everything off quickly – it’s a game-changer compared to hand-cranking. Ensure that you remove every trace of the old line and any remaining adhesive residue.
Assemble Rod & Reel, Thread Guides: While optional, threading your line through the rod guides during spooling makes everything easier and reduces initial line twists. It’s worth the extra minute of setup.
Open the Bail!: For spinning reels, this is critical. Seriously, check it twice before you start. I’ve made this mistake enough times to make it a permanent part of my routine.
Step 2: The Crucial Key – Line Spool Orientation Matters
This is where most people go wrong, and it’s the single most significant factor in preventing mono and fluoro-coiling nightmares later. The general rule is “label up”, or ensuring the line comes off your filler spool counter-clockwise when viewed from the label side.
But here’s my pro tip: don’t just guess! Pull some lines off the filler spool and observe how it naturally behaves. If it immediately tries to loop, kink, or twist as you pull it, you’ve got the orientation backwards. Flip that spool and try again. When the orientation is correct, the line will pull smoothly without curling up on itself.
Getting this right prevents about 80% of line memory problems before they start. It took me embarrassingly long to figure this out – don’t make the same mistake I did.
Step 3: Anchoring Your Line – Securing the Start
For Mono/Fluoro: A simple arbor knot is usually sufficient. These lines have enough grip to hold securely with basic knots.
For Braid – The Critical Step: Braid requires special attention because of its slippery nature. Here are three proven methods:
Option 1: Mono Backing + Double Uni Knot – This is my go-to method for maximum security, especially on larger reels. Wind about 20-30 yards of monofilament first, then connect your braid with a double uni knot. The mono grips the spool, and the braid grips the mono.
Option 2: Arbor Knot + Electrical Tape – A quick field fix when you don’t have a backing line. Tie your arbour knot, then wrap a small piece of electrical tape around the spool over the knot. The key is keeping the tape application perfectly flat – any lumps or ridges will create problems as you wind.
Option 3: Rubber Spool Strips – Many modern reels are equipped with rubber strips on the spool, specifically designed for this purpose. If your reel has them, use them! They work surprisingly well and require no additional materials.
Step 4: Tension is Your Best Friend – Spooling Under Pressure
This step separates the pros from the amateurs. You absolutely must maintain consistent, moderate pressure on the line between the filler spool and your reel during the entire winding process.
This isn’t about brute force – it’s about smooth, consistent pressure. I often drape the line over a damp cloth for extra, even friction. Some anglers pinch the line between their fingers; others use a towel. Find what works for you, but never spool without tension.
Lazy spooling equals guaranteed tangles later. Period. I can’t stress this enough – every loose wrap you allow now becomes a problem you’ll deal with on the water.
Step 5: Know When to Stop – The Art of Perfect Fill Level
Here’s the golden rule: fill your spool to approximately 1/8 inch (about 3mm) from the spool lip. You should be able to see a clear gap between your line and the edge of the spool.
Overfilling creates a domino effect of problems we discussed earlier. Underfilling reduces casting distance but won’t ruin your day like overfilling will.
My pro tip: when in doubt, underfill slightly. You can always add more lines later after some use, but trying to remove excess lines on the water is a frustrating mess that’ll eat into your fishing time.
The Memory Connection: How Spooling Dictates Line Behavior
Here’s what took me years to truly understand: poor spooling technique doesn’t just create immediate problems – it amplifies every natural characteristic your line already has. Line memory, twists, and tangles aren’t just random occurrences; they’re directly connected to your spooling technique.
When you spool against the line’s natural memory (wrong orientation), you’re fighting physics. When you spool without proper tension, you’re creating loose spots that invite tangles. When you overfill, you’re guaranteeing that line will pop off at the worst possible moment.
But when you get it right – correct orientation, steady tension, proper anchoring, and appropriate fill level – your line transforms from a source of frustration into a reliable fishing partner. That persistent backlash I used to blame on cheap reels? It was my overfilled spools. Those annoying coils I attributed to poor line quality? I was spooling backwards.
Mastering these techniques may seem like minor details, but they fundamentally alter your entire fishing experience. Instead of starting each trip wondering what line problems you’ll face, you can focus on what matters – finding and catching fish.
Smooth Spooling = Smooth Sailing (and Catching!)
Perfect line spooling isn’t about being obsessive – it’s about setting yourself up for success on the water. When you take the time to get the orientation right, maintain proper tension, secure your line properly (especially braided lines), fill to the correct level, and remember to open the bail, you’re investing in countless frustration-free casts.
The payoff is immediate and lasting: fewer tangles, longer casts, better lure action, and significantly less time spent dealing with line problems instead of fishing. You’ll land more fish simply because your line behaves predictably when it matters most.
Take the extra five minutes next time you spool up. Pay attention to the line direction, keep that tension steady, and resist the urge to overstuff. Your future self, happily casting without a bird’s nest in sight, will thank you.
Remember, every expert angler has dealt with these same problems. The difference is that they learned from the frustration and developed better techniques. Now you have those techniques, too.
What’s your biggest line spooling challenge? Have you discovered any tricks that work particularly well for your setup? Every angler’s experience adds to our collective knowledge – and there’s always something new to learn on the water.
Tight lines!